The division filter in the lists tab in Admin allows you to create your own divisions for client records displayed in client records and the client grid. The division filter can be ordered make selection easy in the client record.
Note that deploying this feature will remove all previously entered division data in your client records as will removing this feature in the future. Please think carefully before deploying this feature, if you are unsure if this feature is right for your agency please contact a member of our support team who will happily discuss your requirements in conjunction with this feature.
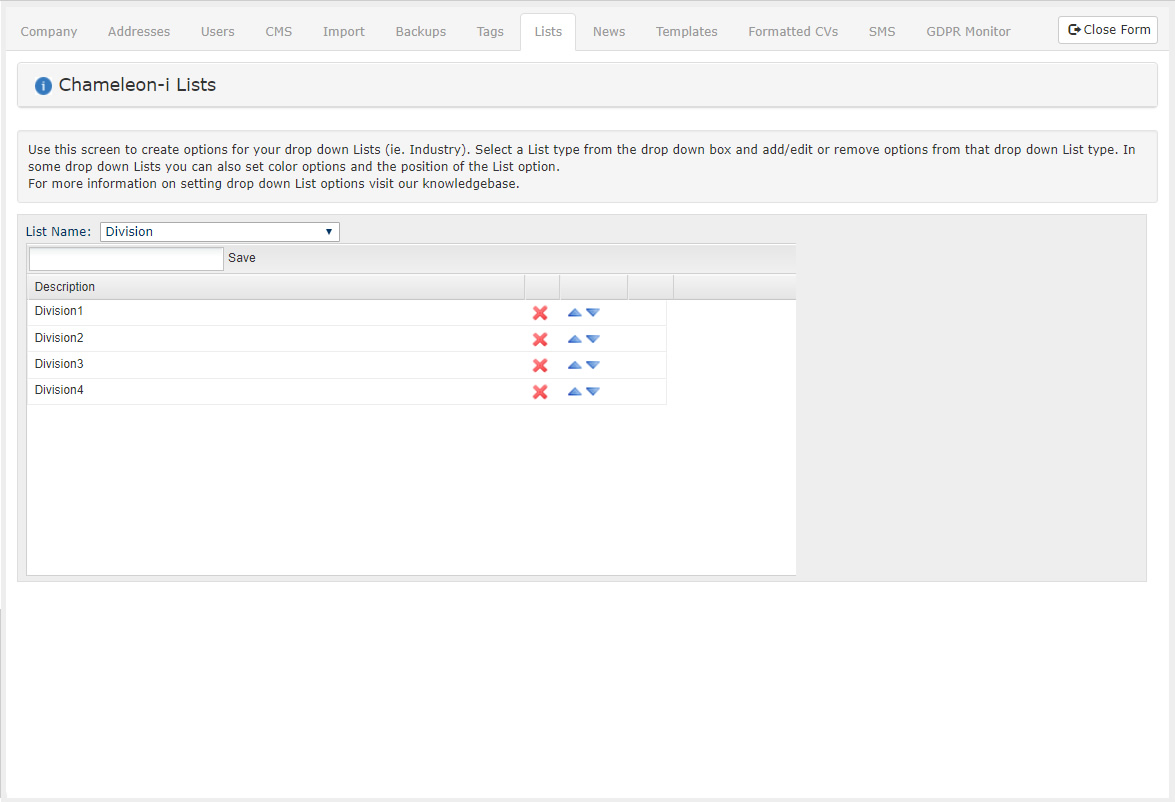
To create/edit your own client contact divisions
- Select the 'Admin' tab from the main menu.
- Select the 'Lists' tab.
- Select 'Division' from the drop-down box.
- Enter your priority name in the text box and press the 'Save' button to upload it.
- Use the 'Up/Down' arrows to order the filter to meet your requirements.
- Click the 'X' to delete obsolete priority filters.
To edit an existing entry 'Double Click' on the entry you wish to edit, this will make the line item editable, edit as required then click away anywhere on the screen to confirm the edit.
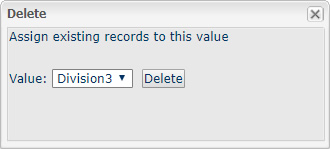
When you click the 'X' to delete an obsolete entry, the following pop will display requesting that you re-assign all records to another in your list. You must do this to delete it from the available drop-down options.