
This article shows you how to reject a candidate from the vacancy shortlist.
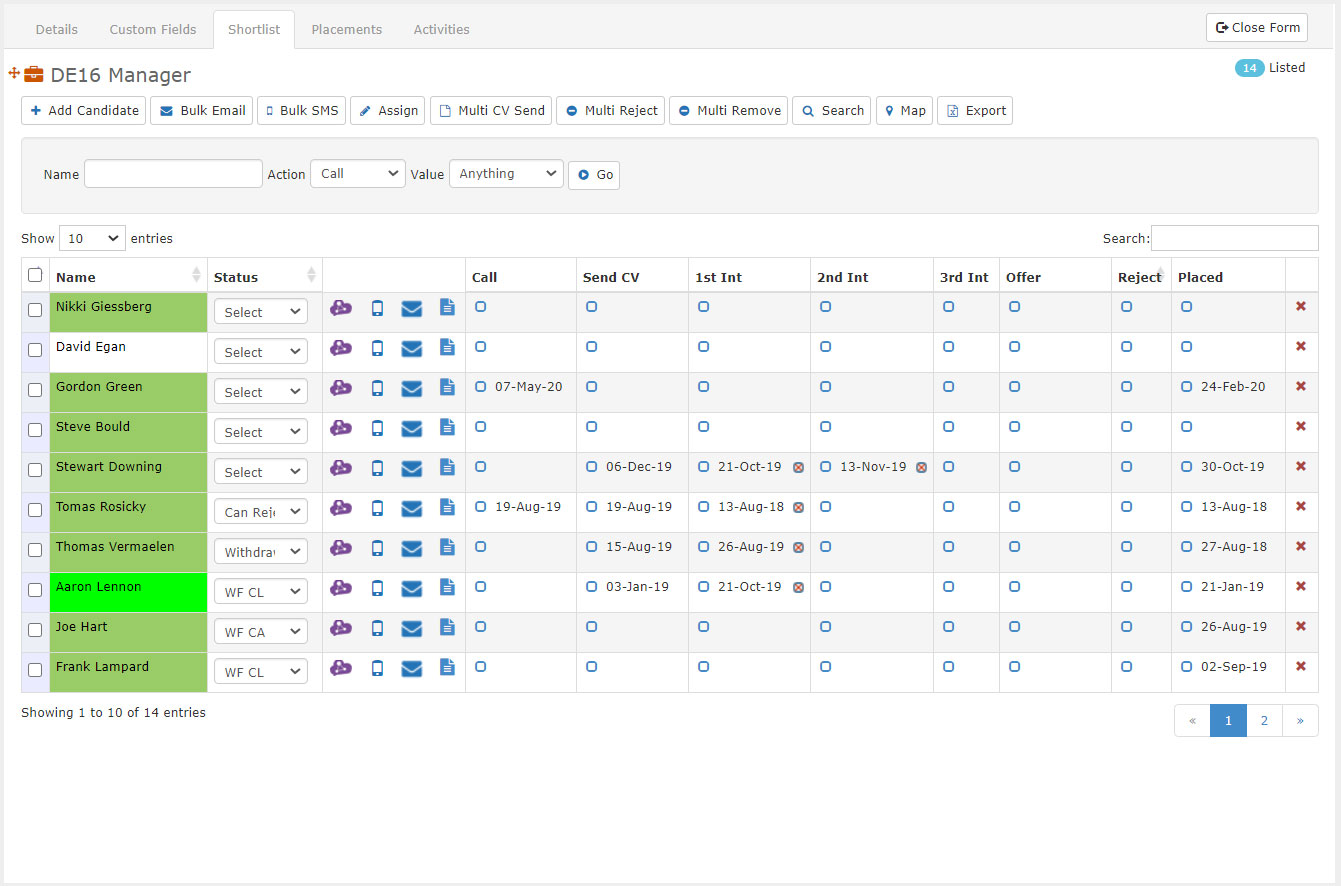
- From the open Vacancy record, click on the 'Shortlist' tab. To Reject a candidate from the vacancy shortlist, click the 'Reject' radio button in the Reject column for a respective candidate to open the Action Wizard.
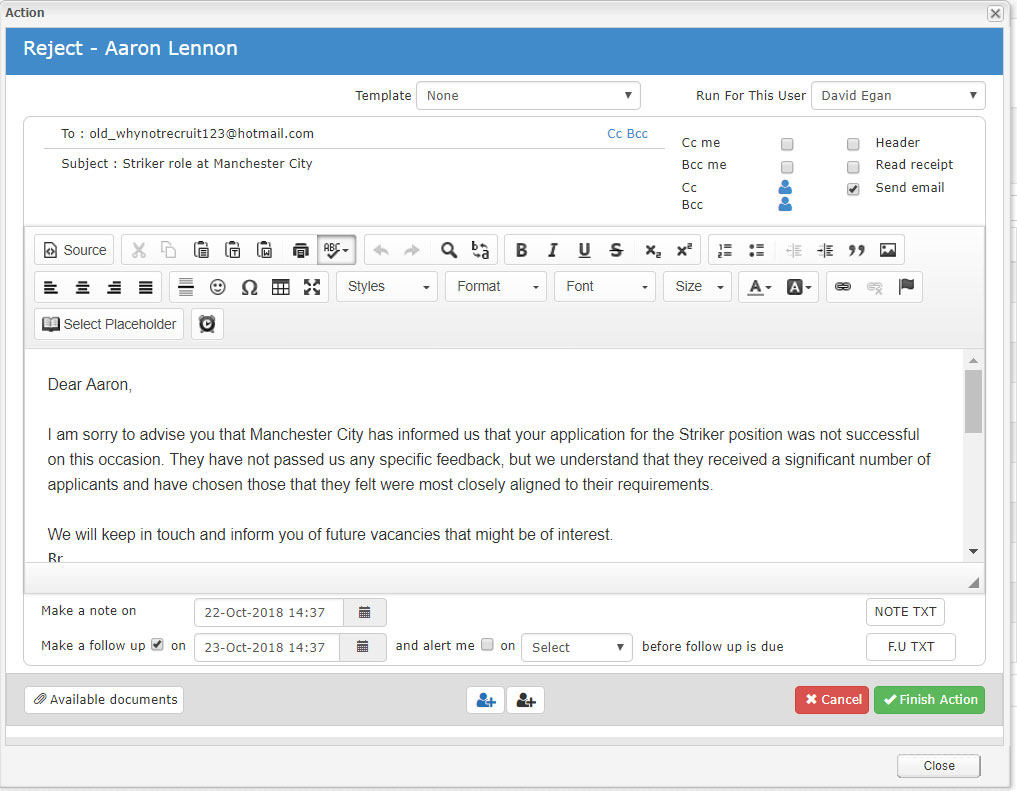
- In the Action Wizard, the Reject email that is sent to the Candidate is populated by the default wizard template. You can, however, select your own pre-designed email template using the 'Template' drop down.
- You can cc and bcc yourself, and others by ticking the boxes or clicking the 'cc', 'bcc' links. You can also include a Header, use Read Receipt or choose not to send the email and just record the action by ticking the appropriate tick boxes.
- You are also able to attach/use documents via the Available Documents button. Select from a document already uploaded on the Company Files table in the Admin area, or alternatively, you can click the More Files button and select a file saved on your desktop.
- A Note will automatically be created for this action but you can also create a follow-up action. To do this tick the 'Follow Up' tickbox and click the 'F.U TXT' button to edit the follow up if required. To complete the Follow Up click the green 'Save Text' button. Set the date and time of the Follow Up by clicking on the 'Calendar' icon and selecting the date and time.
- If you want an Alert to pop up and tell you the Follow Up is due, tick the 'Alert Me' tickbox and set the Lead Time.
- If you want to associate this action with additional clients or users you can select one of the two corresponding 'Person' buttons and search for the contact. This will create an association with the note only and not the follow-up.
- Once completed click the green 'Finish Action' button to complete the action.
- The Reject note will appear on the Notes tab and the Follow Up on the To Do tab. In order for the Follow Up to be reported, you must clear it once it's been done.
- The Reject email will appear on the Email tab.