
On an individual user basis, you can set the data you want to be displayed in your grids when returning search results using 'Custom Views'.
Here is how to set your default view.
From the top of the smart navigation panel press the 'Custom Views' link.

This will open the below panel.
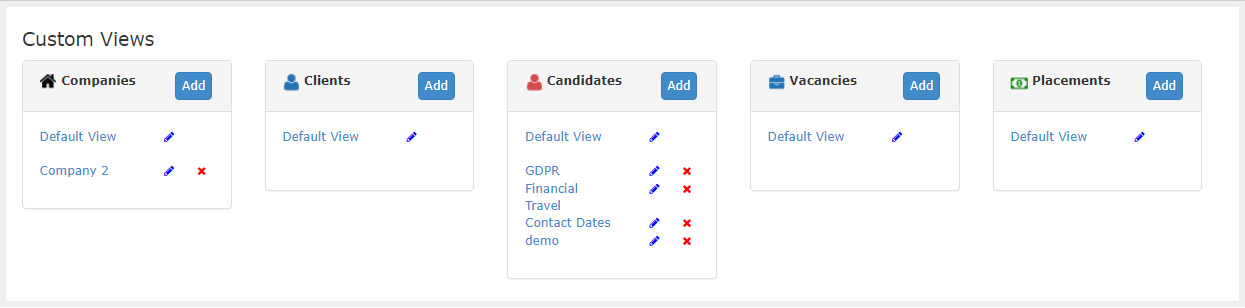
For each record type, there is a 'Default View', you can either edit the default view or add additional views by clicking the 'Add' button.
Let's start by editing the Default View.
Click the 'Pencil' icon and the below pop-up will display.
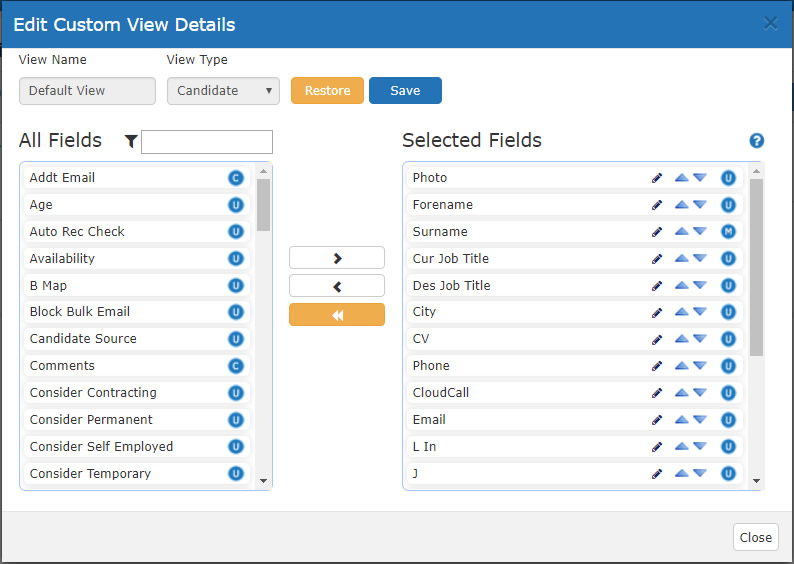
The left-hand panel 'All Fields' shows you the available fields that can be added.
The right-hand panel 'Selected Fields' shows the fields currently selected and assigned to the view.
Use the control 'Arrow' buttons to add or remove fields to or from your default view.
You can order the columns within your grid by moving the fields up or down the Selected Fields panel. This will order them left to right across your grid.
When you have finished editing the default view press the blue 'Save' button.
Click the 'Close' button to close the pop-up.
When you run a search from the selected grid you will see the selected columns returned.
Note if you make a mistake when editing a view or you want to restore the original default view simply click the 'Restore' button and 'Save'.